I decided to take a crack at making a picrew! Here is the tale of what I've learned.
I've seen a lot of tutorials on how to use the website, but not a lot on the nitty gritty process of creating a custom art doll with hundreds of interchangeable pieces before. I hope to err on the side of "too thorough" than "not thorough enough", since I'm the kind of person that likes clear, detailed instructions that explains the necessety of each step. So, here's this. It's not finished, I add what I've learned as I go.
I'm just going to go over the terms I use real quick, so I don't get myself mixed up, and so you know what specific thing I mean when I use a term. Also, I use the website with Google Chrome with the automatic Google Translate on, so I will refer to the buttons and settings on the website by what the translation calls them. They may have different names if you use a different (or no) means of translation, but hopefully the point comes across. I will try to keep all terms consistent with what the website uses.
Before you try anything else, yes, even before you make a Picrew account, I highly recommend doing some prototyping with your art program to see what your component parts will look like, and how you plan to layer them.
The maximum size of a picrew image maker is 600x600 px. If you make your canvas larger than this, you will have to deal with resizing before you upload. No matter what, make sure your image maker is square. I'm not sure what happens if you make a canvas smaller than this, but I'm honestly not sure if or why you'd want to go smaller. For pixel art, maybe?
Despite this knowledge, I am actually going to recommend you make your canvas exactly 1200x1200px, because it is a surprise tool that will help you later. (ie, if you choose to have parts with any resizing features, you need to upload the "original" image at a 200% larger resolution than it will appear by default. This will save you time later, and also some pain, since resizing the canvas will not always resample the canvas in the way you want, leading to weird lines or unfilled pixels)
My canvas is 1000x1000px. Learn from me, do not be like me.
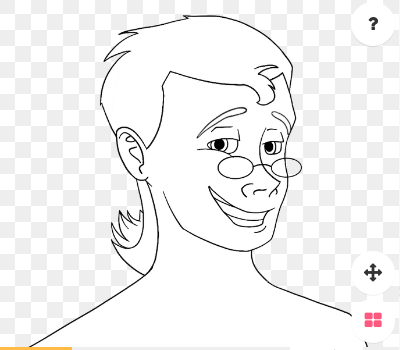
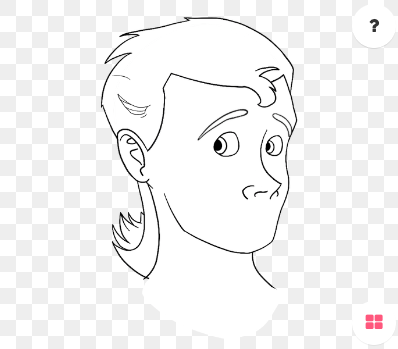
With that out of the way, here's the way I got a grip on the beginning of the process: Start by drawing one of your characters (or favorite character you enjoy drawing), I found that if I tried to design a simple "head" in a vaccuum with no goal, it didn't turn out right. Don't worry about your layers and switchability, just draw your character on one layer in the pose/angle you would like your Picrew to use. Feel free to play a bit, you're going to work with this pose for the rest of the project (but also, don't let anxiety freeze you! You can go back and draw a better head in time, or zoom your canvas a little so you can add more/less clothing options). Don't use any colors or perfect lineart, just sketch out the shapes.
Now, look at your character, and the component pieces of their face. Just focus on the face for now, don't worry about clothes, sketch only as much of shoulders/body as you need for your brain to go "ah yes! We're doing Art today", and then accept the fact your picrew is going to be a disembodied head for a little while.
Where was I? Oh yes. Look at the component pieces of your character. Now, use the select tool, or copy the layer and erase, do whatever you need to do in order to chop up your sketch layer into its component pieces, each on its own layer, however many you feel you want for your different item options. Now your character's eyes, eyebrows, nose, mouth, ears, hair, etc, are all on seperate layers. "fill in" the features if any were hidden by other layers so that they can stand alone (ie, draw the shape of the top of the head in, since it was probably hidden by the hair. Draw the back of the hair where it was hidden by the head. Etc)
Note, this is where layer order, layer naming, and layer folders become crucial. Create a layer folder for every feature you have, and put them in the order that makes most efficient sense to display them in (ie, back of the hair behind the head, bangs in front of the head, eyes behind the bangs but in front of the head, etc). Name them in a way that makes sense to you, like "Eyebrows > Eugene", or, ideally, "Eyebrows > 1" for reasons that become apparent later.
Now that you have those layers in their folders? Try making a new layer for each inside the respective folders, and on those new layers draw new features one by one so that your character now looks like another character! (Preferably one with very different features)
Now, you have two swappable versions of every feature. Mix and match them by turning layers on and off. Do they seem coherent? What do you need to keep consistent in order to make sure everything lines up every time? Do this same process with as many characters as you like, until you have maybe 3-5 versions of each different feature, and you feel like you've got a good sense of how everything fits together. Draw a couple new features on your template for their own sake to test that sense.
Personally, I have found that I needed the "base" of my ears to always be the same area, so I can hide transitions between the hair layers. I also have several reference points on my different head variations that must always stay where they are, so that features like eyebrows and mouths fit and make sense. I have a drawn guide for my eyes that I have to stay in every time. You WILL need reference points like these, even if they're just ones you make note of in your head. Sometimes you can discover them by turning on all your features at once with partial transparency, so you can see the ways they overlap. Also, think ahead, and see if you can think of any trouble spots that would keep certain items from working together. Is there an adjustment towards a common reference point that would help gel things?
Now that you have a few elements, and you've tested their combinations by flicking layers on and off, now it's time to clean up your sketches in whatever way appeals to you, and get ready to start putting them up on the website.
When you line and color your sketches, keep them monochrome, do not faff around with color variations right now. You need to get as many unique parts as you can working together first, because that's going to be the meat of your picrew, and coloring them in now is just going to slow you down. Color will be a sprint at the end once your Picrew is in all other senses "done".
You will technically need to "color in" your pieces, in order for them to hide underlayers correctly, but you can just do this with whatever "blank" color you choose to work with. If you do lineless, you can shake it up in order to see everything properly, but keep the colors consistent across each piece (eg, all hair is the same shade of grey, while the skin is all the same different shade of grey, etc)
"Wait," you say, "aren't we supposed to be talking about how to use the website?"
Once again, not yet. You see, Picrew has a feature called "Bulk Upload", and it's your best friend, because you can upload in bulk (this is a surprise tool that will help us later when we get to color variations), and you can also upload automatically trimmed thumbnails for your items in bulk. To use it effectively, however, you're going to have to name your files all a certain way, which leads to a certain structure.
First, create your main project folder. Put it somewhere where you will not lose it (this means: not your desktop, mine is a 50gb pit of folders named "clean this up" inside folders labeled "a" inside folders labelled "CLEAN THIS". It might very well become a black hole soon. Do not put your project folder on your desktop). This project folder should probably also house the master monster of a file you use in your art program, unless you use something else like Procreate on the iPad (like me).
Create subfolders for every item tab you currently have, and/or plan to have. Things such as "Heads", "Eyes", "Eyebrows", "Noses", etc. Within these folders, you will create a seperate folder named after the color variation of the items. Yes, you put item color before item type, this is due to the bulk upload system. My folder is currently called "white", because I'm working with a coloring book blank slate of uncolored lineart.
Within your color variation folder, you will now put in every piece you have ever made for that category, saving the layers you've created earlier as PNG files (PNG due to the fact that in order for a dollmaker like Picrew to work, you need a file format that supports transparency. PNG is awesome at this). You will name your files numerically in sequence, ie, "1.png", "2.png", "3.png", and so on and so forth. It has to be exactly and only those integers with nothing before or after the number, and files such as "01.png" or "1 hair.png" will mess up the bulk upload system.
Note for the future, make sure you remember which items are 1, 2, 3, etc! This is ipmortant when you go to put in the color variations, so that blue Item 1 is the same as green Item 1, and you don't accidentally turn a ponytail into a mohawk just by changing its color. I would recommend naming their corresponding layers in your art programs accordingly.
Be warned, Item 1 will always be the default item your picrew selects for the category, unless you set the category to select no item by default (I recommend this for accessories, so as not to overwhelm people). I accidentally created the smarmiest little guy in the universe this way. Be flexible to change the order your items are in so you can make a good impression for newcomers!
Use Chrome (this is the only time I will ever advise this, as my general life philosophy is "use FireFox". However, Chrome has a built-in translator that plays well with the website, and I haven't found a comperable FireFox add-on that does this yet), use the auto-translate feature, and you should be able to navigate the UI of the creator pretty easily. Beware the weirdness of text fields and auto translators.
Currently, there's several other tutorials explaining how to sign up for Picrew and use its basic functions. Sorry, I said I'd explain the website, but I'll do that uhhhhhhhhhh... Eventually. Maybe after I add comprehensive pictures to this guide... In the meantime, take the niche problem solving I had to poke around a bit to find.
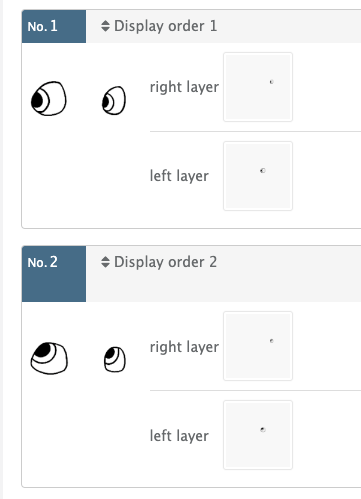
When you go to add a new item to your picrew, you are given 3 options: "normal", "left and right pair", and "last stand".
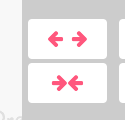
"Left and right pair" is good for, well, when you have a paired left and right item! It gives you the option to put each layer on a different part of the master layer order, and it gives you the option to add the "spacing" button to your picrew. Currently, I am only using this for eyes. Note: When you use this function, the rotation button becomes... Interesting... I hope to figure out why that is too.

"last stand" is an option which I so far have found no clear explanation for, either on the (translated) site or within the community. My best guess is it is the "default" option for the part rules down below, when a conflict of the rule arises.
This function makes it so you can set it to be impossible to combine certain combinations of items or parts. If you try to combine them, it will force the non-compatible item that wasn't just clicked to revert back to default. Unfortunately, this feature cannot be used to "force" a link between one part and another (such as having two unique eyebrow parts so you can move and rotate them individually, and you want clicking one to automatically set and match the other eyebrow). The default item cannot be selected in this rule, as it is what the maker will fall back to when a conflict arises, so you cannot select Item 1 unless you set the default to "no item".
Personally, I don't see any real reason to use the part and item rules if you are creating a "dress up game" style Picrew. Users know what they want, at best they'll not pick items that don't seem to go together at all (like curly bangs mixed with straight back-of-the-hair), at worst you'll prevent someone from doing something that did work, most likely people will just be confused as they click through the picrew to see your options only to accidentally deselect a prior item. I could see it being very handy, though, if you create a random-only Picrew.
The "parts rule" option has a selector called "last bastion", which, as mentioned above I believe is connected to the "last stand" Part option. Otherwise, what it does is a mystery to me.
So what you do now, is upload every item you currently have using the bulk upload feature. Preview your picrew, and use the "item randomizer" button indicated by the 6-sided die on the left of the interface. Be careful, randomize the items, not the items and positions, otherwise you are going to get a veritable Picrew-asso (Get it? Picasso? I'll see myself out).
The random button is your best tool to test that everything you have looks coherent when you combine it with everything else you have. At the same time, some item combinations will simply never gel together, and that's ok. Your audience is smart, and they know what they want, and they won't combine items that don't make sense together (and if they do, then it means that's what they were looking for!). What you want is to create as many good easy-to-assemble combination options as possible, as long as most of them work, you're golden.
You may have noticed if you have been uploading all your images at 600px (and did not read my wisdom about canvas size) when you go in to add options to reposition, rotate, and resize your features, the default becomes really screwed up. This is specifically due to the "resize" option, where this is the only time you actually want your images to be a size other than 600x600.
To fix the issue, and to allow users to resize items to their hearts content, take all your PNG files for the part you wish to have a resize option for, and scale them up to 1200x1200px. The way that the website works is that if the resize option is enabled, your "master" image upload will appear by default at 50% the original resolution, so that it has space to scale up. Picrew does not resize your images for you. So, you need to allow it to scale up to the maximum that the website will allow, which is 200%, which is 1200px. Reupload your desired files to the website. Now, go in and turn on the resize option, set your minimum and maximum to whatever your heart desires, once you have your 1200px image upload, there's really no more weird fiddling you have to do. When you open your preview, you will find the layer now defaults to the correct size and position. You can also use this if you wish to export and upload everything at 1200px and do not wish to resize any of your files, because you can set the option to have a minimum of 100% and a maximum of 100%. This takes away the scaling button, and makes everything behave normally. I think it may make the maker a little laggier though.
This is where I am currently. I'm not really that qualified to write any further, because, well, this is where I am currently. You have a good sense of what you're doing in your master file for creating and combining features, you have a good grip on how to upload them to the website and see how they look together, so... Now what?
You draw, and you draw, and you draw and then you draw some more. This is the meat of your Picrew and there's no getting around it is a buttload of work to do.
Pace yourself, this is a marathon, not a sprint, don't burn yourself out, have grace for when your art skills outgrow the art quality you began with. Don't delete old assets unless they like, really really really suck.
Try to focus on creating content for one feature at a time, until you have a good solid chunk of them, but if you're getting burned out on, say, noses, feel free to switch it up for a little while. Use the bulk upload feature liberally. Use the bulk upload feature even if you only are uploading one image.
Break up your master file once it begins to chug from sheer size. Save the original, obviously, but make copies where you delete all but, say, the mouth variations you're working on, and the pieces of your template you need as a reference to draw coherent mouth variations. What I then did was upload all these items into color categories, like "skin", or "hair", so that you can color and export all at once when you get to colors.
Reference your own art. See all the different ways you draw eyes, you'd be surprised how much variation you actually have! Steal from yourself. Make it so you can accurately create every last one of your OCs in the maker.
I took a while to get around to adding a variety of clothing options, and would recommend doing the same. Hop around between different facial features/hairstyles for sure, but save your accessories untl after you have a good chunk of facial features and hairstyles down. This is, again, going to be the absolute core of your picrew, character hair and face options > clothing and accessory options, hair and face will make or break the ability of someone to create themselves or their OC accurately!
I, tired of creating new unique option content, decided it was time to shake it up a little, and finally add color options. Sometimes you need this for personal enrichment, and I think it's helped me get on top of any potential problems before they got out of hand. I was at around 100 items when I kicked this off, and that feels like a good number.
How it started is, I originally created a completely flat, monochrome Picrew, but I decided I wanted to add some production value by adding shadows and highlights to the art. I would recommend you start here, and make sure you put your flat color, your highlight color, and your shadow color all on different layers, this will help keep things consistent and quick when you go back to add color variations. This revealed some issues pretty quick.
First, it wasn't apparent when working in all white, but when working with different color options, you can see that when I resized items to upload, the canvas resampled weirdly and created seams on certain parts. How I solved this was recoloring after I resized, rather than before.
Once I was satisfied with the colors and shading of all of my pieces, I rearranged all my original images into different project files according to their color palette. All hair items went together, all skin items went together, etc. I also went and turned on Alpha Lock for every layer, to make adding colors easier
Picrew has a color limit of 3 rows of 6 colors. Which can be a lot, depending, and you will need to use them wisely. I recommend planning at least the basics beforehand, and keeping the palette in a 6x3 grid on a layer in the relevant project. Plan and test together every color you will need for each color option, make sure you're satisfied with how they all look together before you go on and color everything: I needed 4 colors for every hair option, for example, one for the base color, one for the shadows, one for the highlights, and one for the lineart. When you are ready, create a copy of your project file, name it after your desired color, and go through filling every last layer with its appropriate color. Procreate has an option that will export every layer in a project as PNG, so when I was finished, I flattened (hence, DO NOT DESTROY YOUR MASTER FILE. Make a copy. Double check before destroying layers this way ALWAYS) all the color layers into a single item file, and then exported the entire project with every remaining layer a unique PNG file. You may not have to flatten in other art programs, I am not sure of their features.
Take the desired part you want to upload, and go to the settings menu. In the bottom right hand corner, it will show you a menu of currently available color options. One already exists, it is white. Now, click the color icon there, and copy in the hex code for the "base" color from your items (it is a pet peeve of mine when the color of the options in the UI bears no relation to the color that appears on the avatar. Please make sure your colors match). This will now be the color that shows in the user's color select UI when there is more than one color available. Now, go and bulk upload your items with the correct layer and color selected! Isn't that the most satisfying thing?
Repeat however many times you like. I am only uploading one color of hair per week, since the recoloring and uploading process is huge and tedious.
In order to save users time and make the experience better, you're going to want to link certain parts so that they will all always be the same color. My hair and skin colors, for example, are layered in such a way that they are meant to be viewed all the same color, as the seams between them look pretty bad. It's also a pet peeve of mine when I have to repeatedly go in and select the same shade for ears, mouth, nose, etc, it is really tedious.
To do this, go to "color palette setting", and create a new palette. Add every item that you want to be linked (For hair, I linked "main hair", "lower hair", "hairline", and "bangs". Both eyebrows are linked under a different palette, as are the beard and mustache), and then select which color option of each item the palette will use.
Also, for each palette option you create, you will need to copy in the hex code of your colors a second time, as the website linking palette will override the colors of the individual items to create a streamlined experience.
Congrats, you now have color options! Remember, if you add a new color, you're going to need to take the time to add it to your linking palette, as the website does not do this automatically.
When you're finally ready to share your Picrew, whether privately to friends (as I've done here and with friends) or on the main website, perhaps you still want to play with adding or changing things!
But wait, you changed something, and it shows up on the preview, but your friends say they can't see it. What gives? Well, turns out the "preview" button is not synchronous with the "check on site" button! All the work you've done between first publishing your picrew and now is visible to you, but you have to "push" those updates to the public version. This is useful for when you're adding something very involved, like colors, and are worried about what it will look like when only half the options are available. No one has to see it til it's good and ready.
To push your updates to the public version, go to "Release/Public Settings" underneath the preview button, scroll down to press the orange button titled "to release".